In a few easy steps, you can create an amazing and reasonably low priced gift for friends and family.
String art is a trend that has been around for the past few years. My interest was peeked a few months ago through Pinterest, which is a great app for DIY ideas. For this project, I chose to do the Yankee symbol because I am native New Yorker. However, you can pick whatever you choose whether it be lettering or a symbol, it will all work the same.
Step 1: Gather all your materials.
For this project, you will need five items.
- A hammer
- Nails (1- inch)
- A piece of wood ( I chose 2×2 plywood from Home Depot – $5.87)
- Chalk for dark backgrounds or a pencil for light backgrounds.
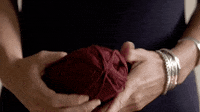
- Yarn (Do not get super soft plush yarn. Get yarn that is fairly thin, so it’s easier to wrap).

Step 2: Paint your wood
Paint your background, this can vary in time length depending on how intricate you want your background to be. I chose black and it took 10 minutes to paint and about that time to dry.

Step 3: Draw your design
Once the paint has dried, take the chalk or pencil and drawn out your design. You can also print out a design and outline it if you’re not the best artist.

Step 4: Hammer in your nails.
Along the lines of your design, hammer in the nails. There should be a nail about every inch or closer. Do not have too much space between the nails because your art won’t look as filling. Make sure the nails are secure and not sticking out through the back of the wood. You should be able to push them and not make them budge.
Erase any chalk that may be visible using wet cloth. Do not use a paper towel because it leaves residue. You may need to add more paint to bring back the richness of the color and hide any remains of chalk. If you do repaint, then let it dry before starting to string the yarn. It is important that the pain it fully dry because you do not want paint on the yarn, especially if you are using contrasting colors.

Step 5: Start stringing.
Take one end of the yarn and tie it around one nail. That will be your starting point. Make sure to tie the yarn tight around the nail. If the first knot is not secure and it unravels, it can mess up the art as you tug harder further along.
Once the first knot is secure, go in a zig zag across and up and down. It should not look uniformed. Everything should look chaotic. That is what gives the art its design and flair. As you work, you will understand.

Step 6: Outline your work
After you finish, go around the outline of the art work so that way it looks closed and complete. Tie a final knot around a nail. If you can not tie it around a nail, try tying it around other pieces of string. It is important that the end of the string is tied tight because it is holding the whole art piece together. Cut off any excess string.

You now have a finished product. If you would like to hang it on a wall, add self-leveling picture hangers on the back ($2.08 at Home Depot).

Leave a Reply